I don’t even know where to start. This week was a whirlwind; some bad, some good. And then there were great parts, like my son’s graduation, which we got to celebrate as a family. He delivered one of the keynote speeches at the grad ceremony and did an amazing job! I can’t believe that he’s off to high school next year. He’s been at his current school for 10 years, so it’s truly the end of an era. Come fall, it’s going to feel strange to have the kids going to different places in the morning – not to mention logistically challenging, haha! But we will cross that bridge when we get to it.
Meanwhile, the next big event coming up is my annual clothing swap on Saturday. For the first time in years, the weather looks like it won’t be cooperating to allow us to hang out in the back yard. Speaking of logistical challenges … trying to figure out how to fit 16+ people in my (modestly sized) living room has been occupying me all week. But it’s a good problem to have! I am so looking forward to seeing everyone. This year, the guest list is all clothing swap veterans plus a few “next gen” members (aka daughters of OG participants). We love to see that! I’ll write more about it next week.
And THEN, next Tuesday is another big day: pub date for The Mysterious Affair at Gaunt Hall. If you are planning to get the ebook, please consider pre-ordering it – pre-sales are super helpful in creating early visibility for books. A paperback version will also be available come June 9. This week, I received my first ARC review and it was super positive, which was great. This book is a departure from the style/genre of my first two books, so I am extra nervous and excited to see what readers think about the story. In the words of my editor, it’s a ‘wild, fun ride’ 🙂
And speaking of exciting things on the horizon, I am taking next week off from work and I am beyond excited. I’ve been in low-key burnout territory for months, and I need a good reset. In the past, I would have tried to use any vacation like this in a “productive” way, but I have made a pact with myself to do nothing of the sort this time around. So … no writing! I’ll try to keep chores and errands to a reasonable amount, too. The kids are still in school (and my husband will be at the office), which means I will have most of the day (and the house) to myself – bliss!
The current plan is to do a little gardening, a little scrapbooking, a little cooking (for fun), and lots of reading. I’ve fallen way behind on my reading, and my TBR list is out of control. The one thing I probably won’t get a chance to do is thrifting; wee currently down to one car, which my husband is using for his commute, so I won’t be able to get out much, except for walks, during the week. Honestly, I don’t mind. I love spending time at home with my books and my projects.
In case you were wondering, I’m still fully onboard the scrapbooking train. In fact, I’m more onboard than ever. Obsessed, you might say. Scrapbooking is that magical thing that reconciles not one but two sets of conflicting paradigms in my life. Item one: creative self-expression feeds my soul, but the drive for external validation that is built into many creative pursuits feels soul-crushing. Item two: having a meditation practice contributes to my mental wellbeing, but my neurodivergent brain can’t handle most typical meditation practices. Scrapbooking is a creative but inherently personal pursuit; the objects I create cannot be monetized and, therefore, their value is entirely independent of external validation. Scrapbooking is also (to me) a very meditative activity, in the sense that it effortlessly puts my brain in a state of flow, which is my version of a “clear mind”.
I’ve been sharing what I call my “daily pages” (full-page collages I make in my scrapbooking journal) on Instagram because (a) I find vicarious enjoyment in looking at other people’s scrapbooks and want to share that thrill with others; and (b) as a devoted hobbyist, I want to (passively) spread the scrapbooking bug, lol. Basically, similar reasons to why I share my thrift finds.
I guess it’s been working too, because I’ve had a few people reach out to me, curious to learn more about my methods for creating my daily pages. Since I am not sufficiently skilled in Reel-making to create video tutorials or even progress videos, here I am writing this post instead. With photos. And my best attempt at breaking down the process, step by step.
Step one: blank page
My current scrapbook journal is a 9 x 12 inch, spiral-bound drawing notebook (purchased at Dollarama). I think it originally had 80 pages, but I can tell you, that’s too many. By the time you collage both sides, 40+ pages become extremely chunky. Even with a spiral binding, there’s not enough room to keep the pages from getting bent, etc. I’m not sure what the sweet spot would be; I am only here to tell you that you don’t want a book with too many pages (or, like me, be ready to rip some out).
My preferred style of collaging is full-page coverage, so the goal is to find scraps that cover the entire surface of the page. I like to think of it as a blank puzzle that I assemble as I go along.
Step two: choose the focal piece(s)
In every collage I make there is a focal piece — sometimes 2, but rarely more than 3. This is usually an image of a person, animal, or unusual/interesting object. Basically, focal pieces create the first landing place for the eye. They also set the tone/vibe for the rest of the collage. Everything else gets built around them. To put it in clothing terms, these are your “statement pieces”.
Focal pieces tend to be the largest individual scraps on the page, though this is not always the case; if I’m using smaller focal pieces, I tend to use 2 or 3 to create a composite arrangement. Most of the time, I end up using one large and one (max two) smaller focal pieces. The key is that the pieces have to be big enough for the details to be visible and catch the eye at a first glance.
Once I got serious about scrapbooking, one of the first things I did was to sort and organize my scraps. I keep focal pieces in 2 folders, one for large pieces and one for small pieces. This makes it easier to peruse my available options and choose whatever strikes my fancy on a particular day.
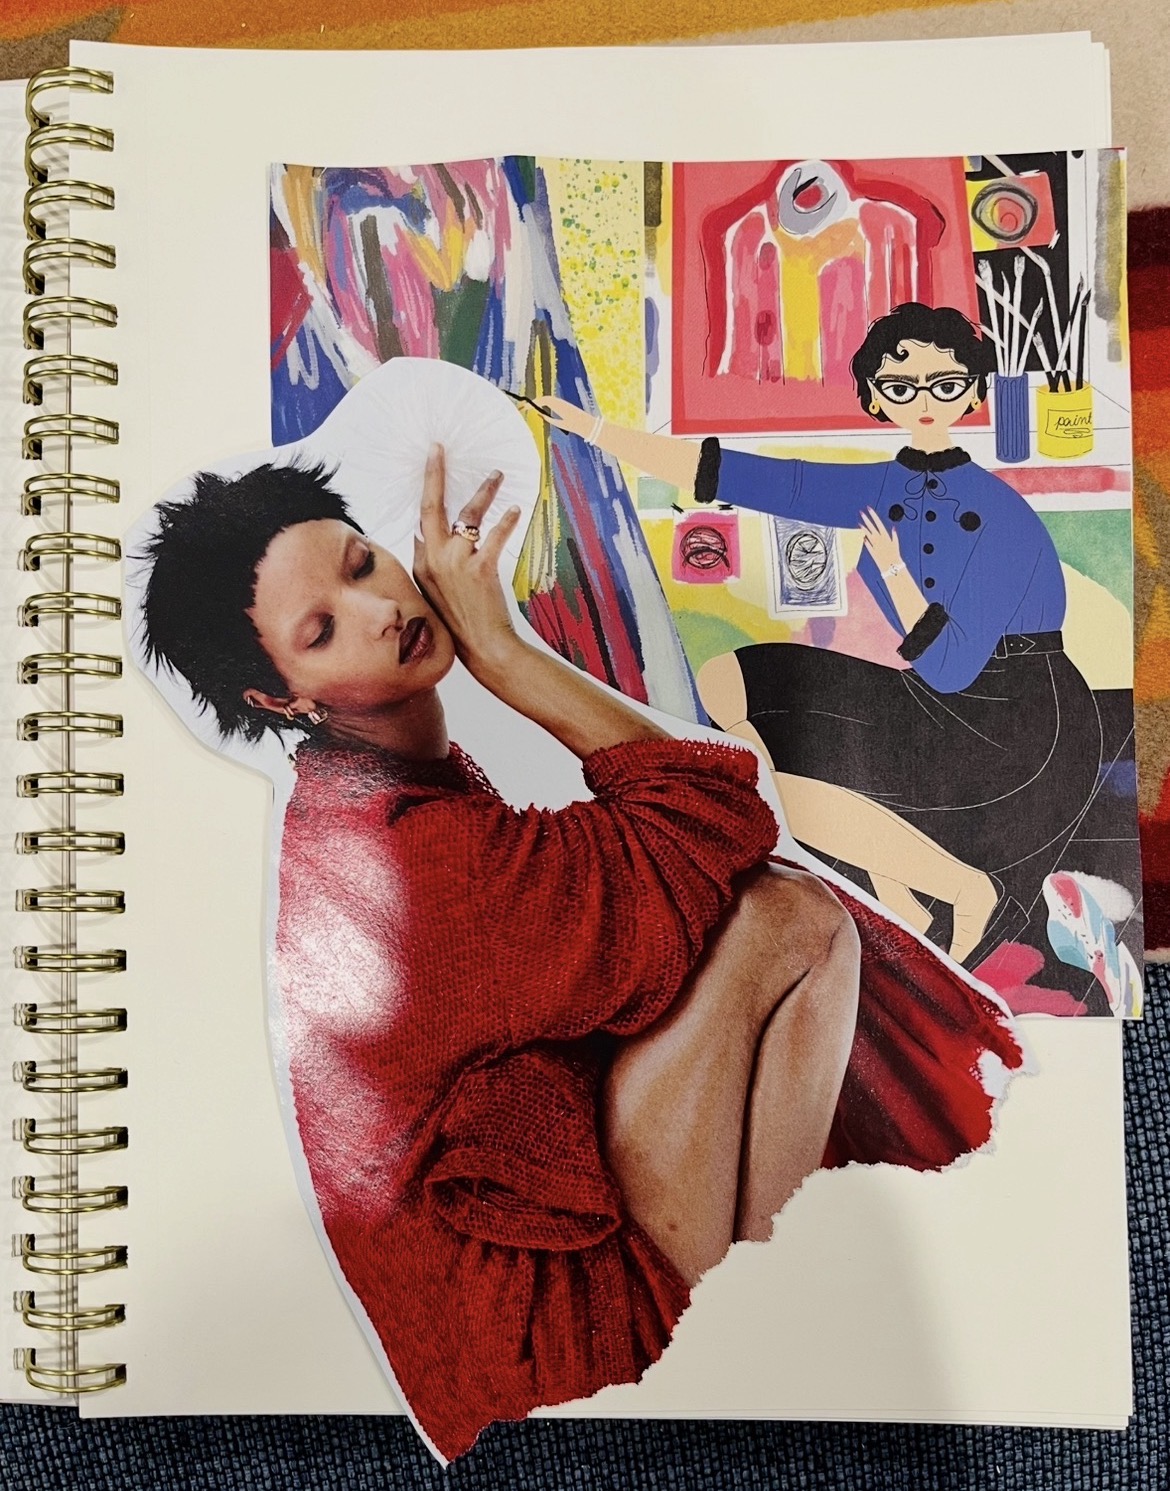
To help illustrate, let’s build a page together. Here are the focal pieces I chose:
Step three: arrange your players
Once I’ve got my focal pieces, it’s time to decide where they go on the page. For this, I use their shape as a guide and eyeball a position that feels “right”. Personally, if the image is partially cut off, I will often try to line up the straight edge to one of the edges of the page. But there’s room to play around; I have a bunch of techniques I use to “hide” missing parts of an image, if need be, which gives me leeway to put the image pretty much anywhere I like.
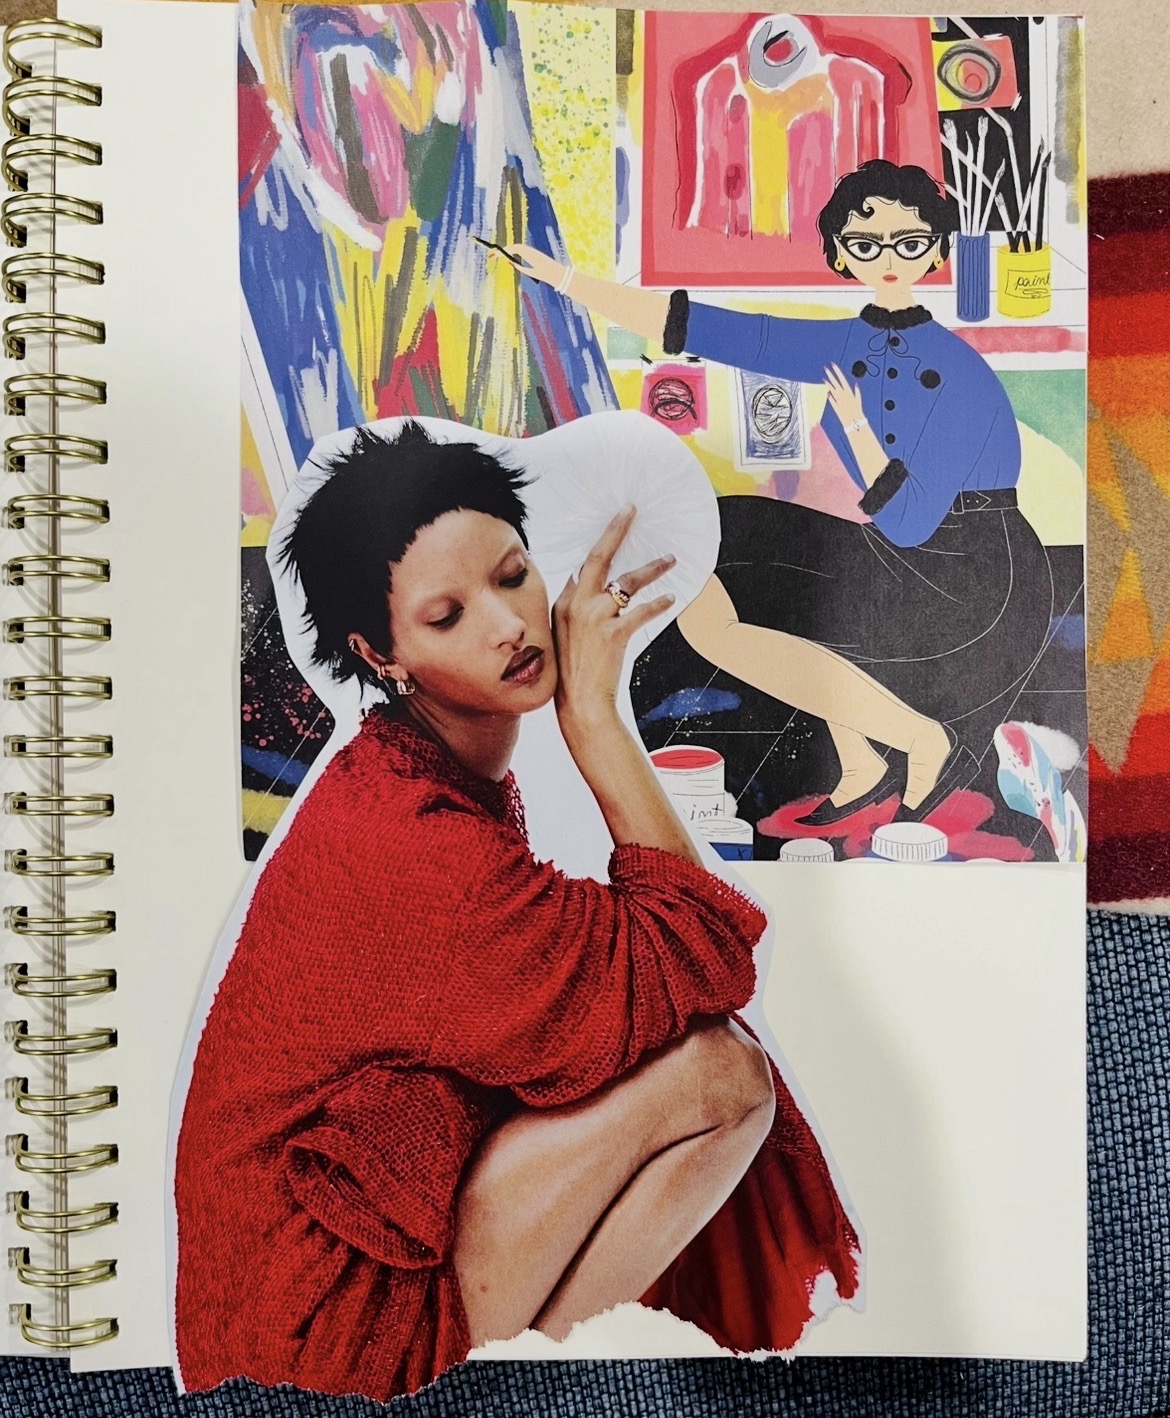
In this case, I decided I wanted to put my focal pieces roughly here:
This now creates a bunch of space that needs to be filled in, and defines the general parameters of the other puzzle pieces. I think of this blank space(s) as the “stage” for my players (aka the focal pieces). Time to design it!
Step four: set the stage
Background or set pieces can come in a variety of flavours, but mine tend to fall into four general categories: landscape and other figurative images, abstract patterns, solid colours, and printed materials (book pages or musical scores). To make my life easier, I also sort these.
First, by size. I have larger pieces organized in one accordion folder, and smaller scraps in a different one. Second, by directionality/positioning. I separate scraps into a number of categories, like: top (of page), bottom, right hand edge (full page), left hand edge, bottom right corner, top right corner, bottom left corner, top right corner, non-directional, etc. What this allows me to do is quickly find and review available materials based on what “puzzle shape” I’ve got to fill on the page around my focal pieces. Choices are made based on vibes – what feels like it “goes” with the focal pieces and the vibe of the page. If I need to, I re-cut and re-shape existing scraps to fit.
I start by filling the biggest “holes” and go from there. I “dry fit” each piece as I add it, without gluing anything down at this stage. Part of this process includes deciding how to layer pieces. To continue the theatre analogy, some pieces are foreground, some are background. Focal pieces are often in the foreground (aka top layer) but not always.
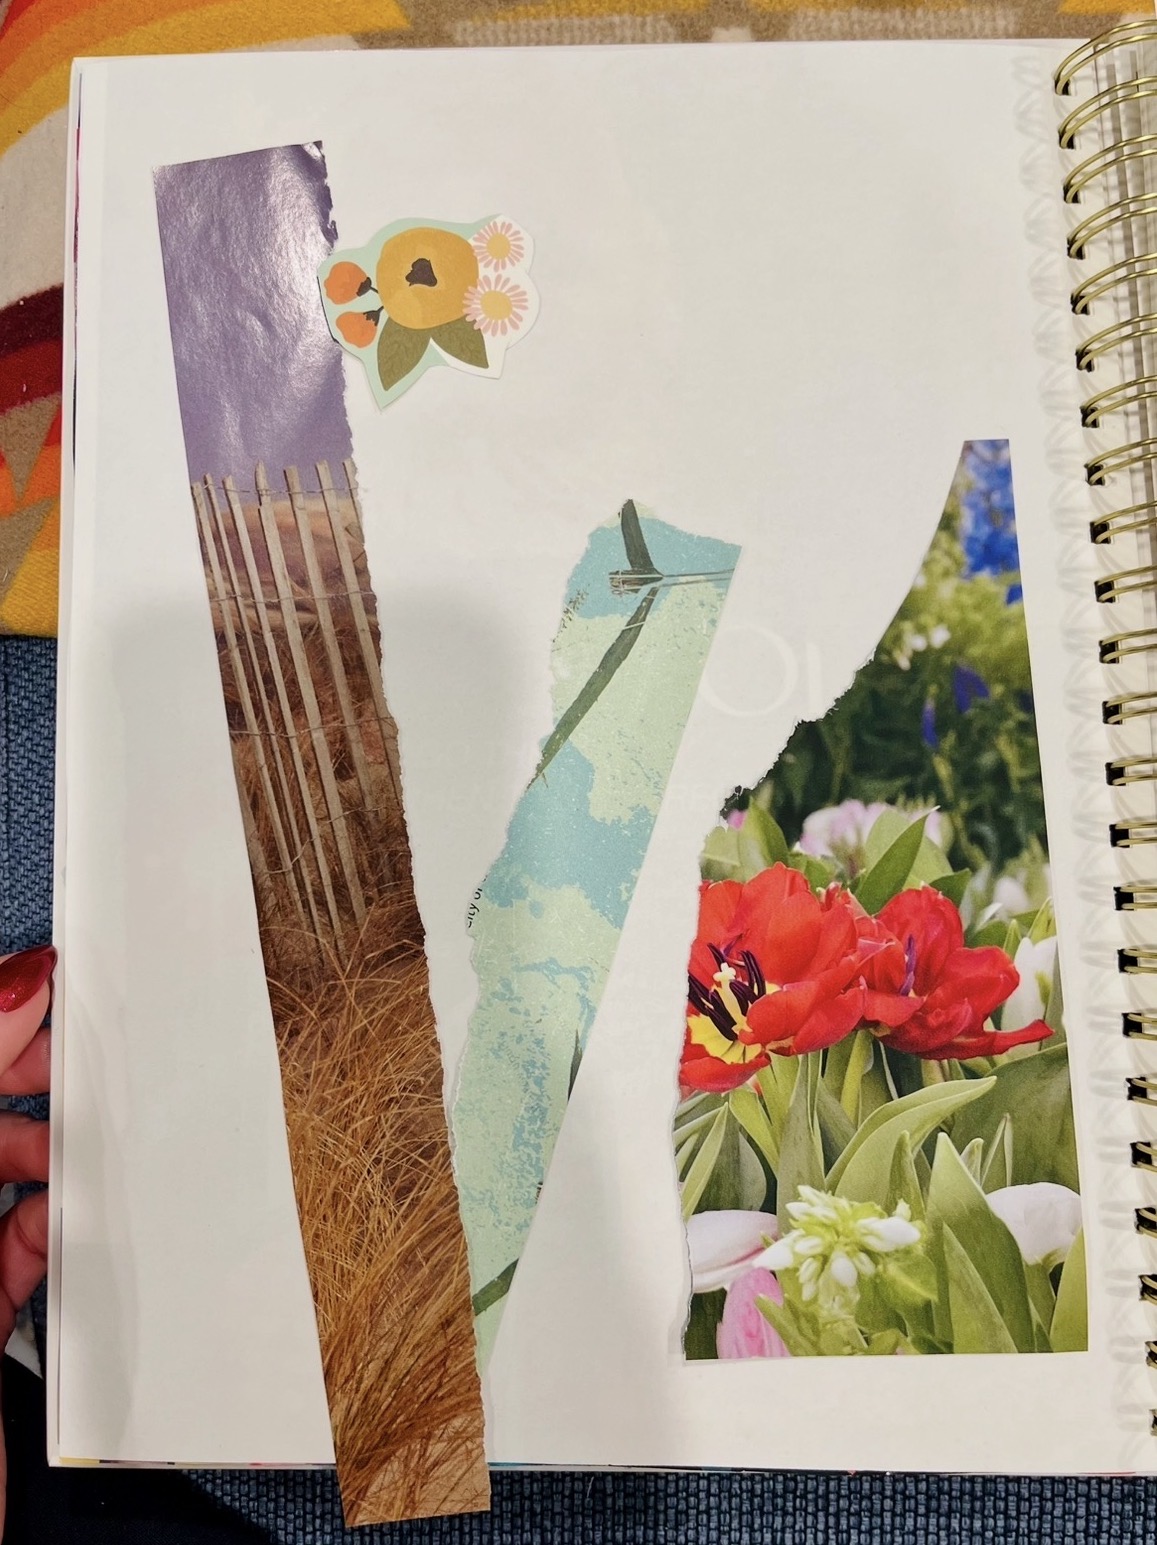
Here’s the set pieces I chose:
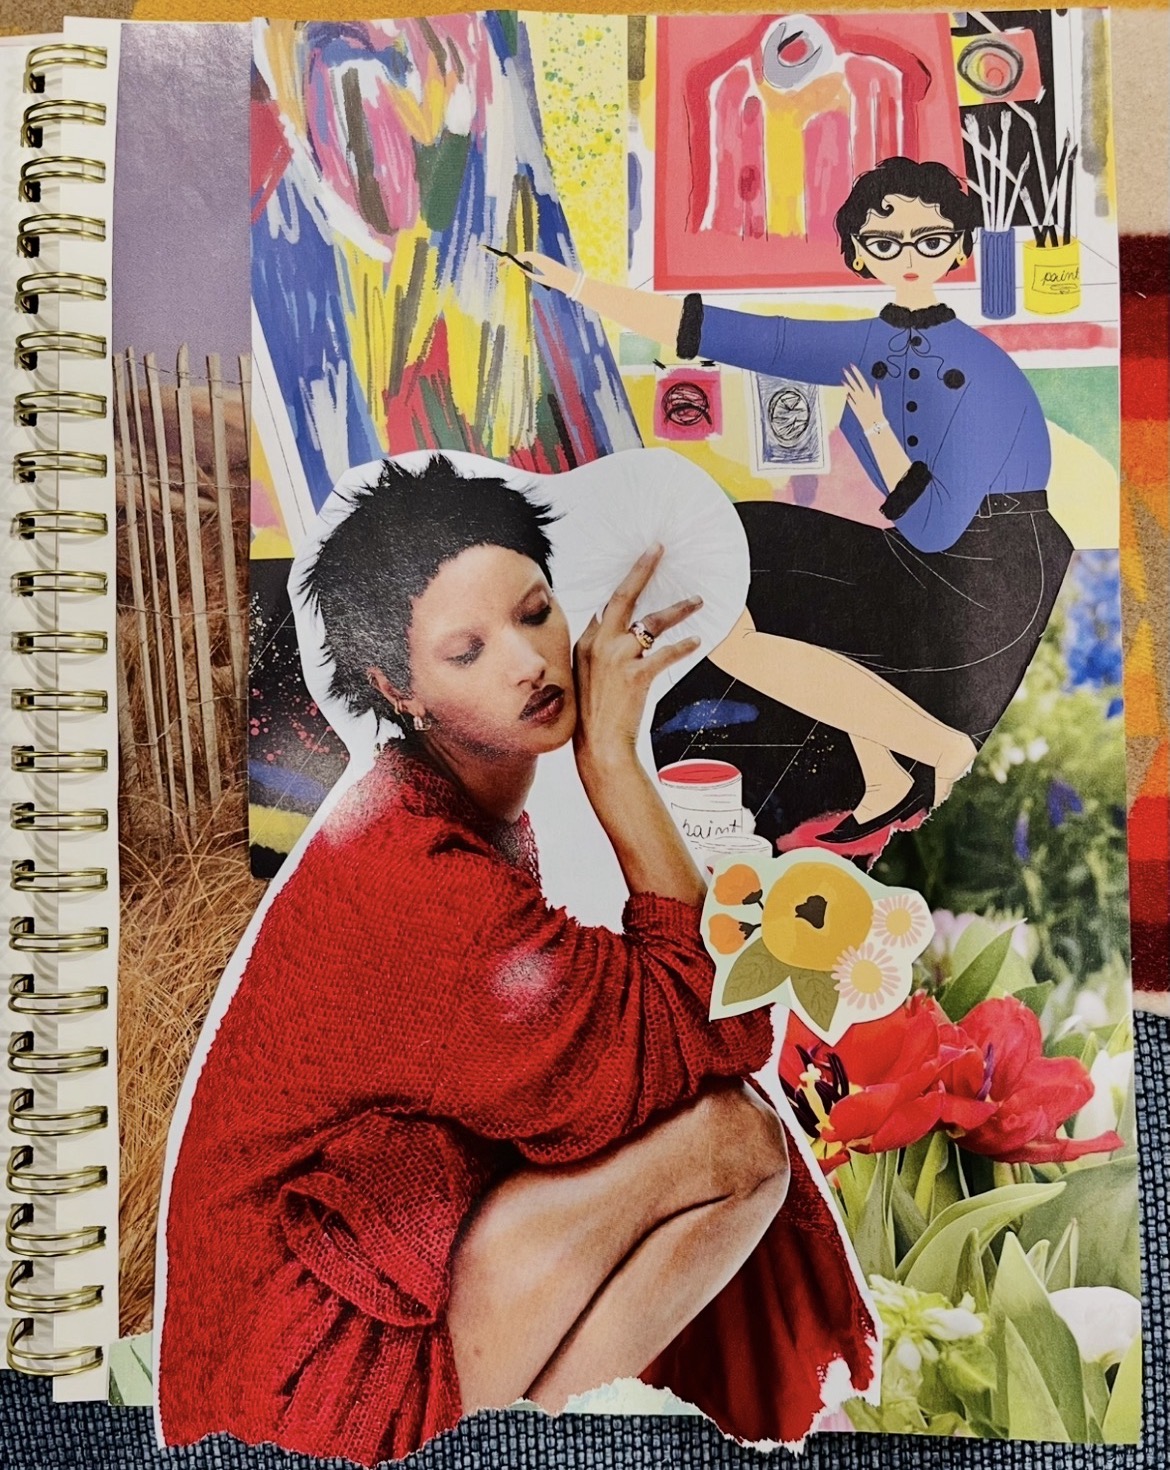
And here is how everything fit:
Step five: gluing time
This is pretty self-explanatory but a small tip. Once you’ve assembled the complete collage in the previous step, un-assembled it in reverse order in preparation for gluing – and keep that order straight. That is to say, you want to make sure that you are gluing your bottom layer first, and then gluing pieces in sequential order so you end up with the correct layers. I have been burnt on this in the past. I rush and don’t pay attention to the order that pieces are meant to be layered in, and end up gluing layer 3 before layer 2 that’s meant to go under it. Ugh, it’s the worst!
Step six: frosting time
Frosting is what I call adding the final finishing touches; for me, this is usually stickers and lettering/block text (that is meant to be read, not part of the setting). I almost always add stickers – because I love stickers, lol! – but I don’t always add text. Sometimes, I add stars in contrasting colours (made using paper punches) because it’s a motif I enjoy, as an extra pop on the page.
To keep with the cooking metaphor, this whole step is basically “season to taste”. [Sorry, I’ve mixed my metaphors! Hopefully, you get the idea.]
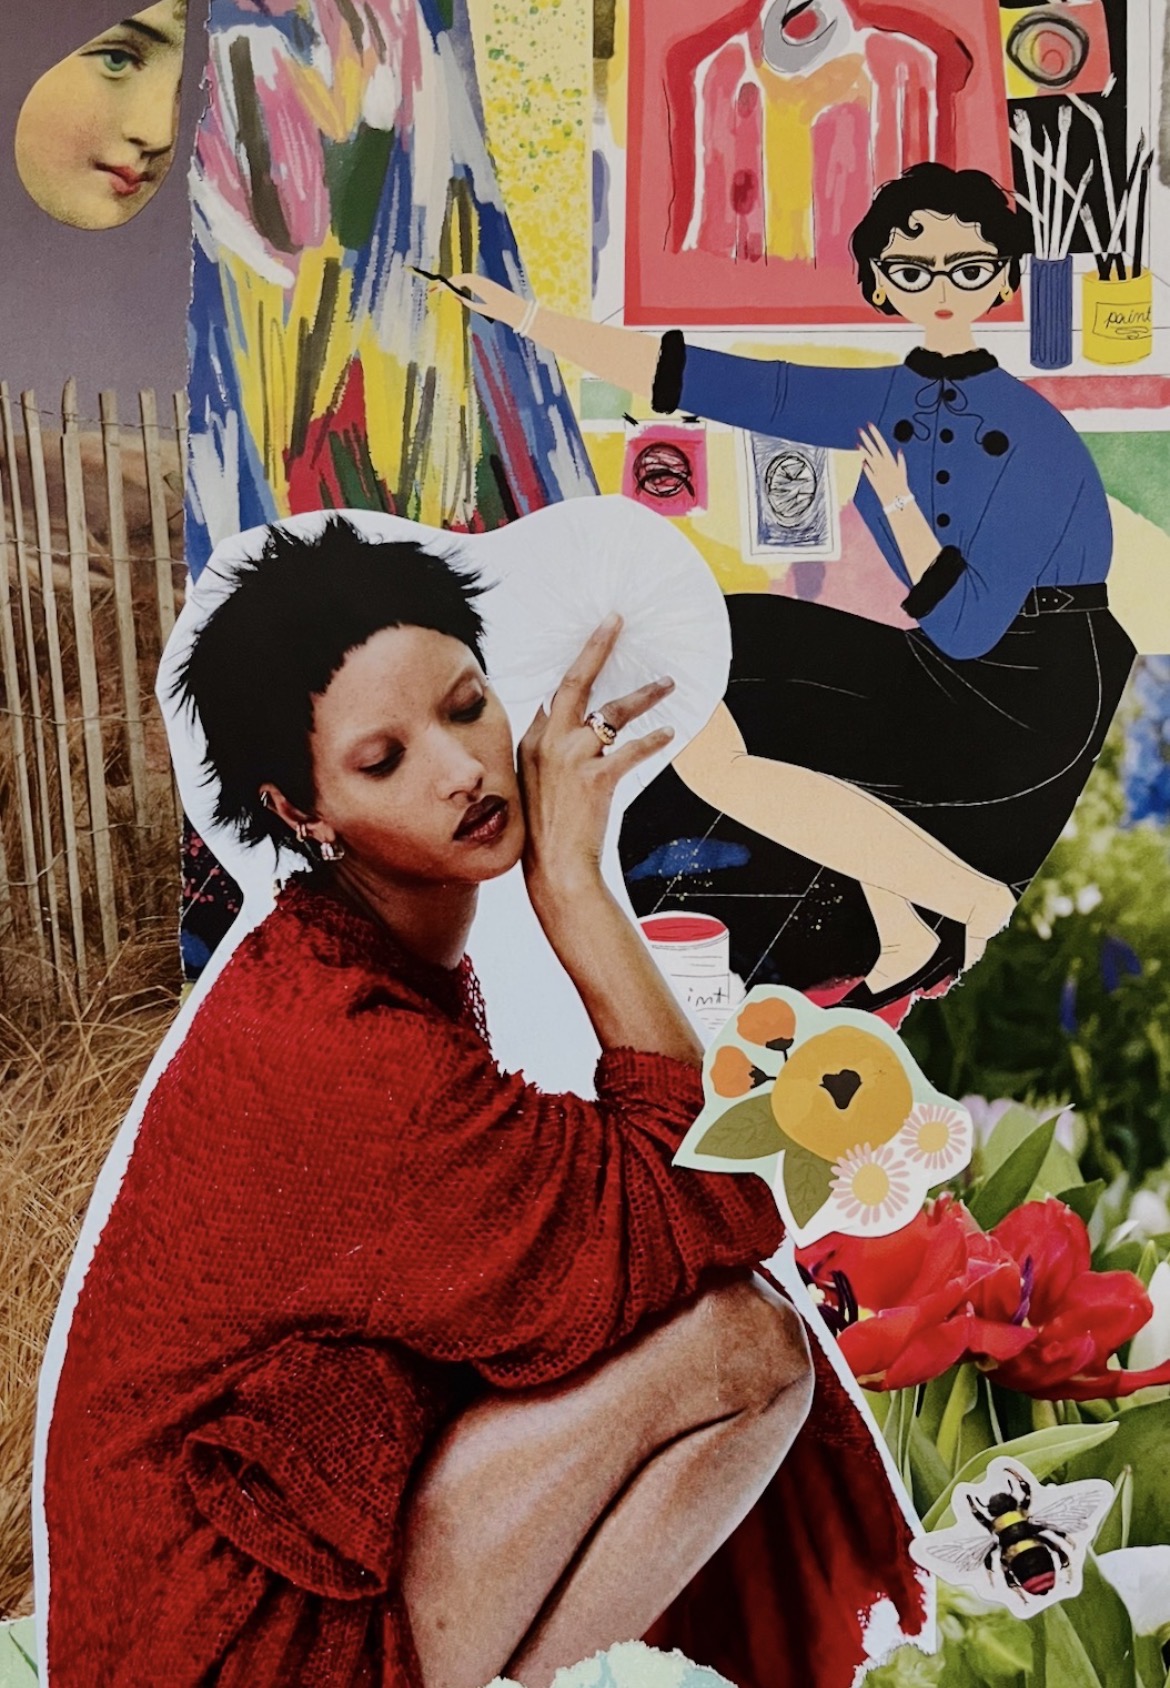
Here’s the final collage, all frosted:
If this all sounds complicated … trust me, it’s not! It takes much longer to explain than it does to actually do. The whole point is not to overthink it. And, keep in mind, this is only my preferred process. If you’re wanting to give scrapbooking a try and don’t know how to start, feel free to use it. But once you’re comfortable, I would encourage you to explore different approaches and see what feels right to you. There are no wrong ways of scrapbooking! That’s the beauty of it.