
These days, my mind is positively humming with new craft projects I want to do. I keep a running list, and that list keeps growing because time remains a precious commodity. But the ideas and the plans keep me feeling energized. Over the last year, I’ve realized that making things with my hands (much like thrifting) is one of the sources of my personal contentment. I am far happier when I have at least one project on the go (along with a good book), even if I can’t spend time on it in a given day. The more ways I have to express myself – be it through crafting, or decorating, or personal style – the better I feel. Getting to share all of it here is a nice bonus. Let me take this moment to thank you all for reading and sharing your thoughts, encouragement, and recommendations with me over the years.
Alright, on to the project at hand.
I spotted this blazer in an inspo album someone posted on Female Fashion Advice (Reddit), and was immediately hooked.
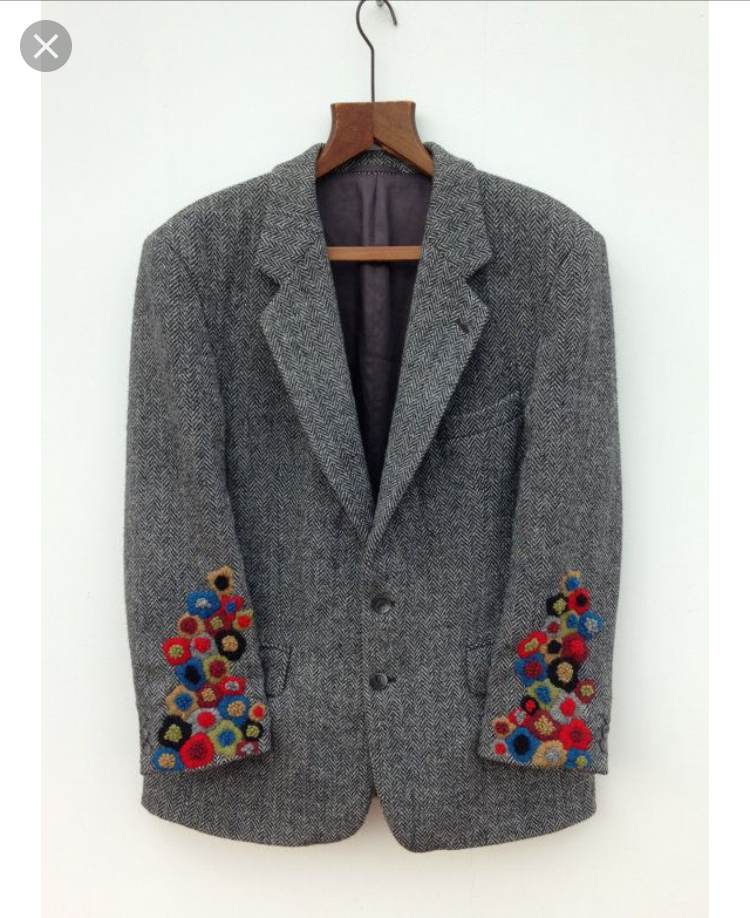
[The entire album was really great, and I wish I had bookmarked it because of course now I can’t find it. Gah.]
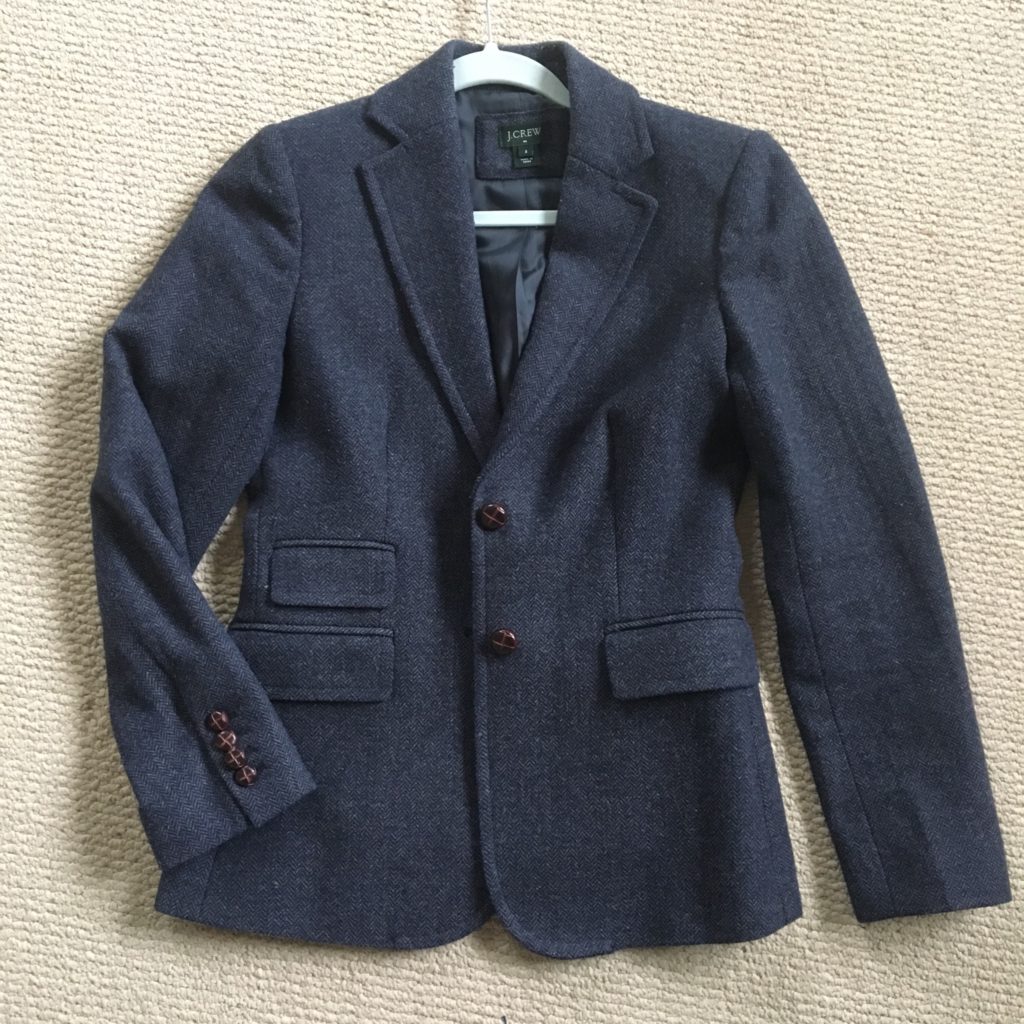
You guys know how much I love professor-ish blazers; adding the hand embroidery details was a chef’s kiss move. I have been interested in visible mending for a while, and this seemed like a non-scary way to test those waters. I had my old J. Crew Factory blazer which, apart from the colour (navy blue vs. grey), was almost identical to the original inspo. I haven’t been wearing it much lately, so it was due for a refresh. I decided to go for it.
Now, in some respects, I was correct in thinking that this would be a fairly simple project. The actual embroidery itself couldn’t be easier. On a hoop, I could probably knock it out in a few hours.
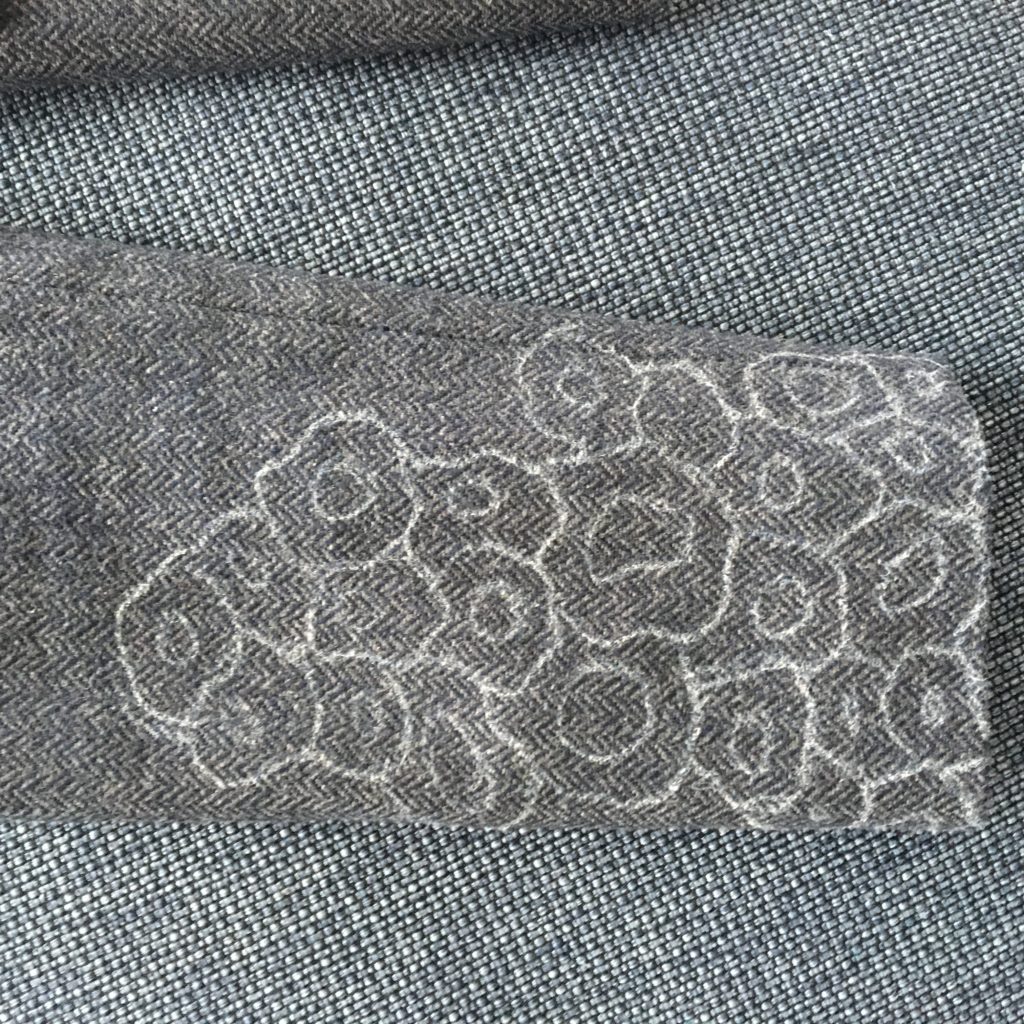
But I didn’t account for the logistics of embroidering a lined, wool blazer. And a blazer sleeve at that.
A combination of factors worked against me. One, the sleeve opening is not very large, so maneuvering the needle in and out slowed me down significantly – especially on the higher (up the sleeve) part of the design. Two, I could not stretch the material over a hoop, which would have helped to keep everything straight and steady. Three, the lining was a pain in the you-know-what. The polyester material was slippery and the lining was not fully attached to the sleeve, so getting it to lie flat against the wool fabric was impossible. The fact that I didn’t sew the sleeves shut in the process is a minor miracle.
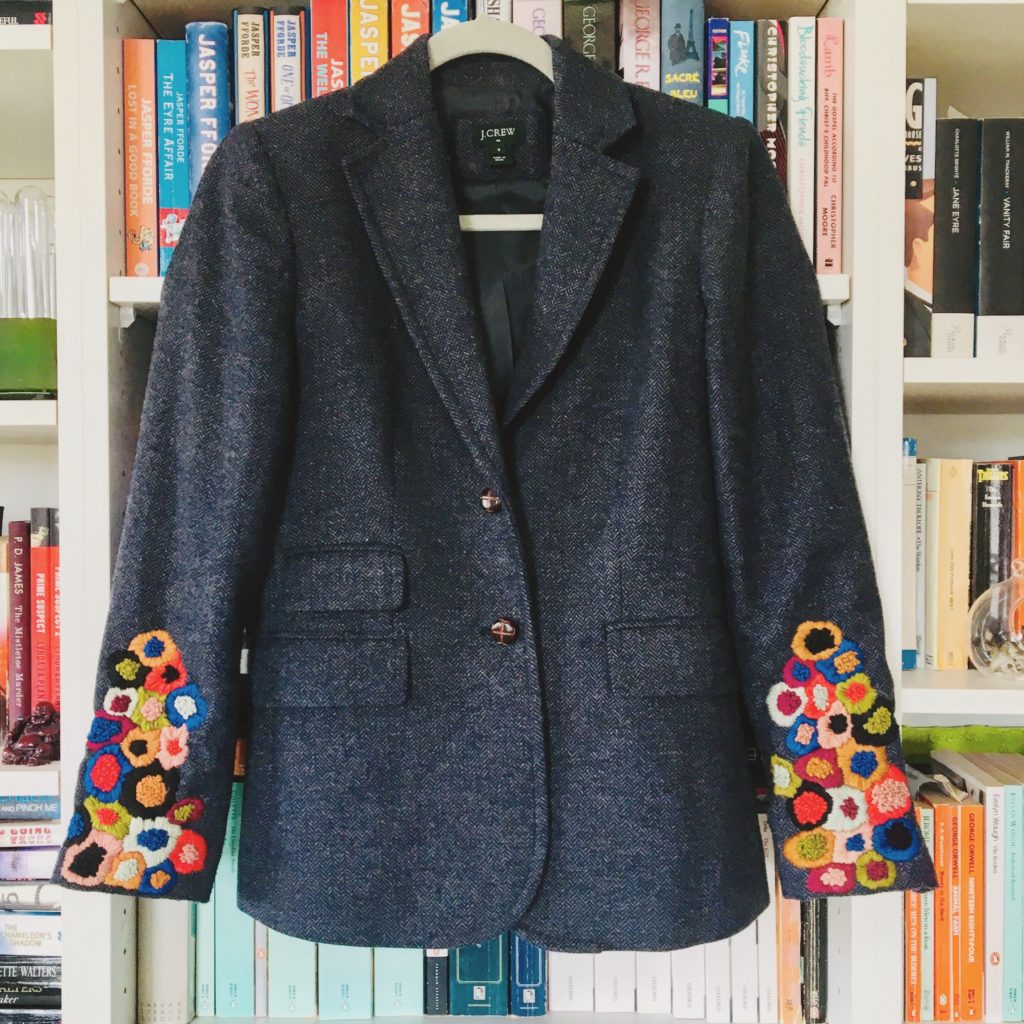
All told, the project took me over 2 weeks to complete. But I did it … with my sanity mostly intact. Never again, though.
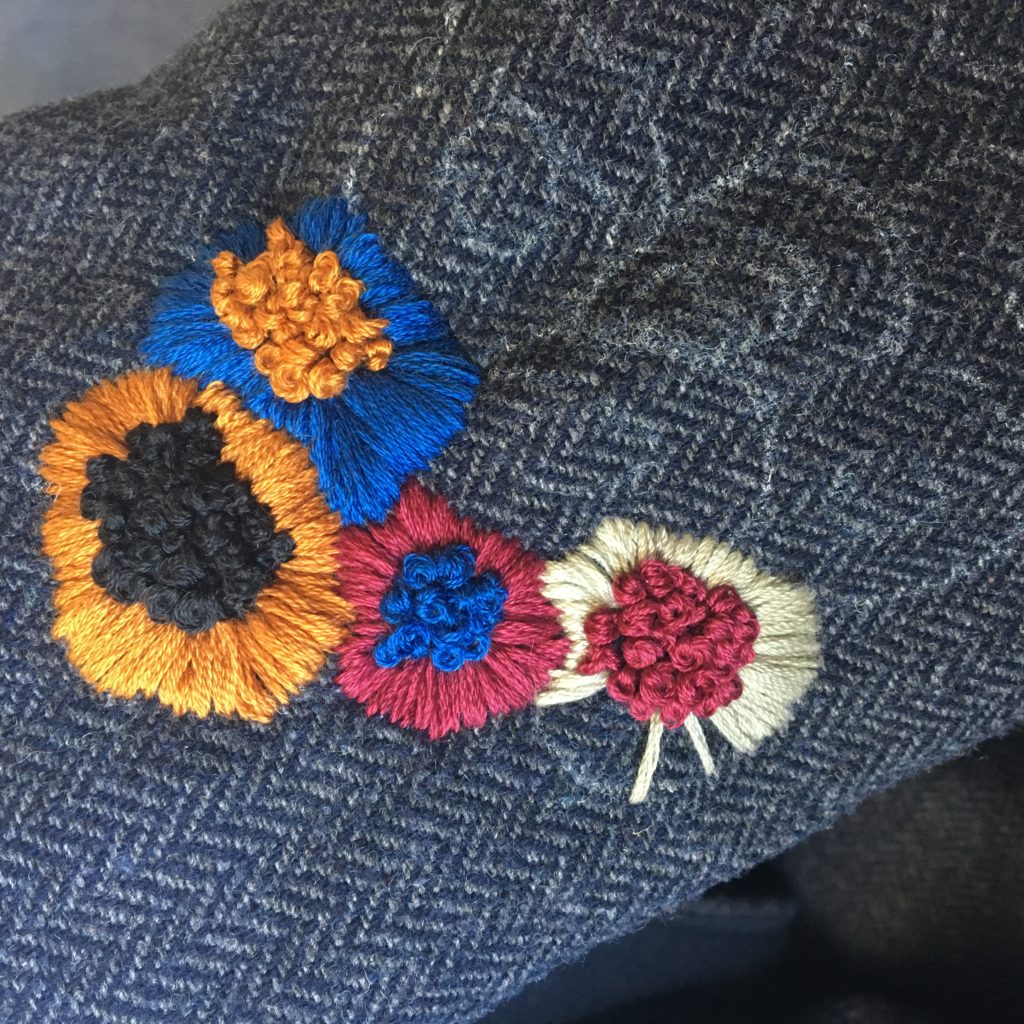
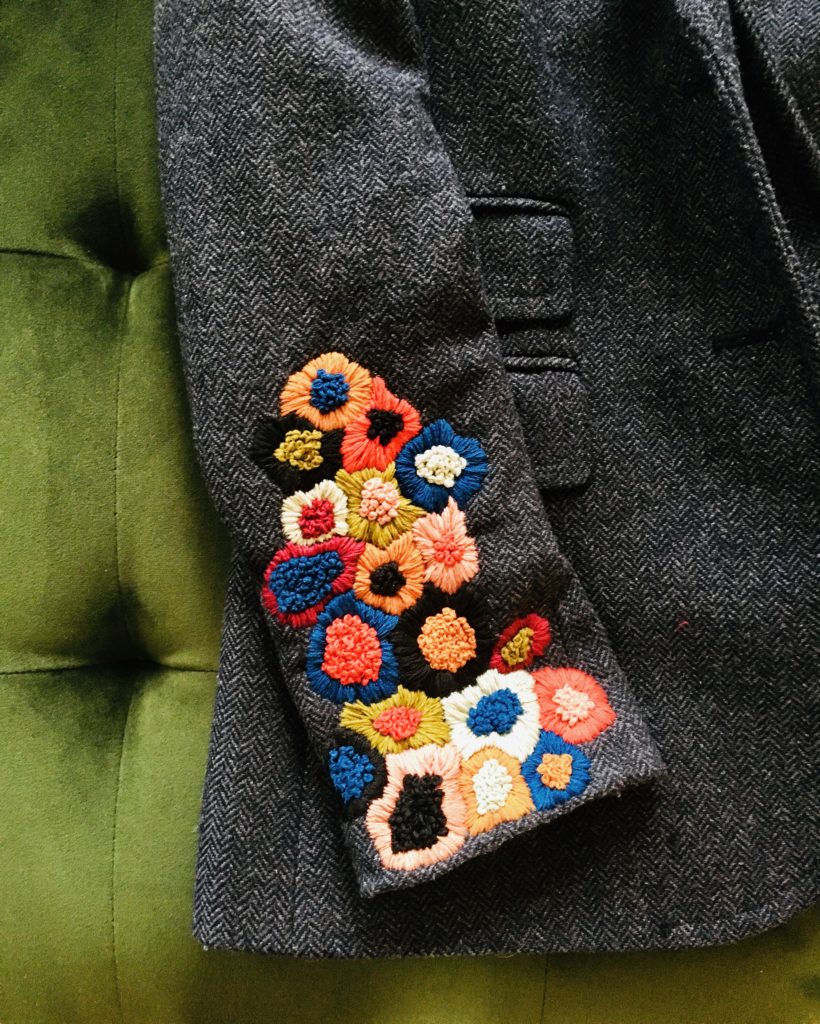
And here is the finished product:
Of course, I had to pick a special outfit to inaugurate my “new” blazer.

I love it!!
Thank you!
You did an amazing job! Absolutely Gorgeous 🤗
Thank you so much 🙂
This is completely amazing and your colors are so well chosen! Should another brave soul attempt this (not me), it might be possible to open the sleeve on the seam and then put the fabric on a hoop. Or at least run a few rows of stitching to tack down the slippery lining.
Just WOW.
My sewing skills are basically nil so I didn’t dare attempt that, but it would make a lot of sense for someone with more talent than me in that direction.
Ha! I would totally do the seam ripping and sewing but never attempt the freehand embroidery! Cheers to you for your beautiful work!
Incredible.
Wouldn’t be quite as cool, but if you wanted to try something like this again it’d be easier to embroider your design on a separate piece of material and then sew it in place when done. (Or iron on stuff, then, umm, iron it on.)
Totally! I kinda like the look of the embroidery directly on the sleeve fabric, but an appliqué would be work as well, I think.
Wow, that’s amazing! It reminds me of the brightly coloured embroidered tablecloths I used to see when we lived in Hungary (in a good way!).
I had fun doing the design itself, I loved playing with all the colours. I may or may not be working on a kind of follow up project right now 😉
Looks awesome!