Category: DIY

Anthropologie Bag Rehab

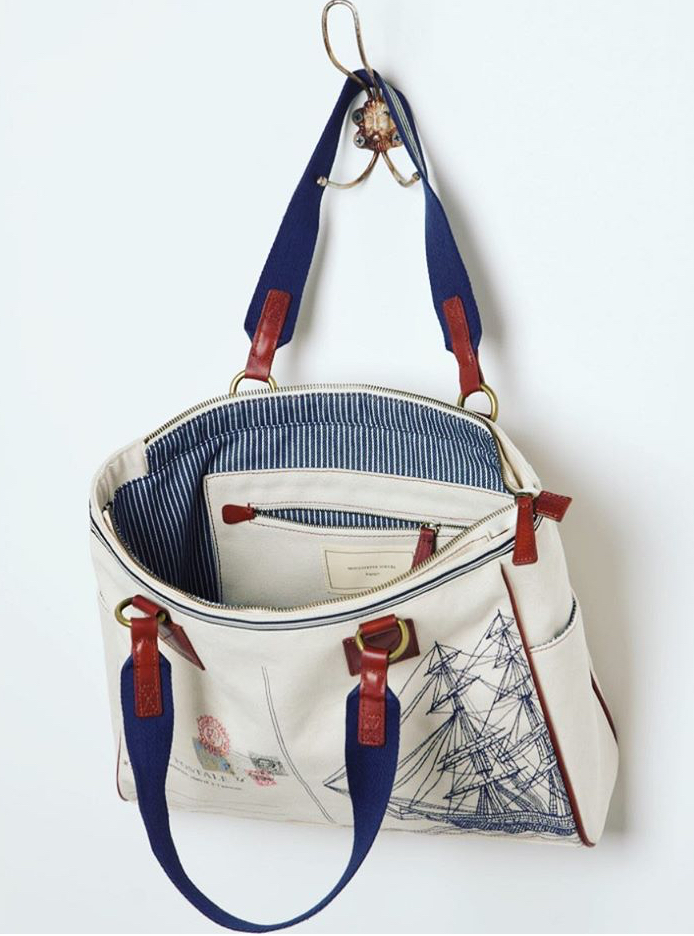
Late last year, I found myself developing a penchant for quirky, non-designer bags. It started with a random Moulinette Soeurs tote I spotted (and impulse bought) on eBay one day…

C27991F7-67EA-48C5-B05E-9D0E5A68FA84

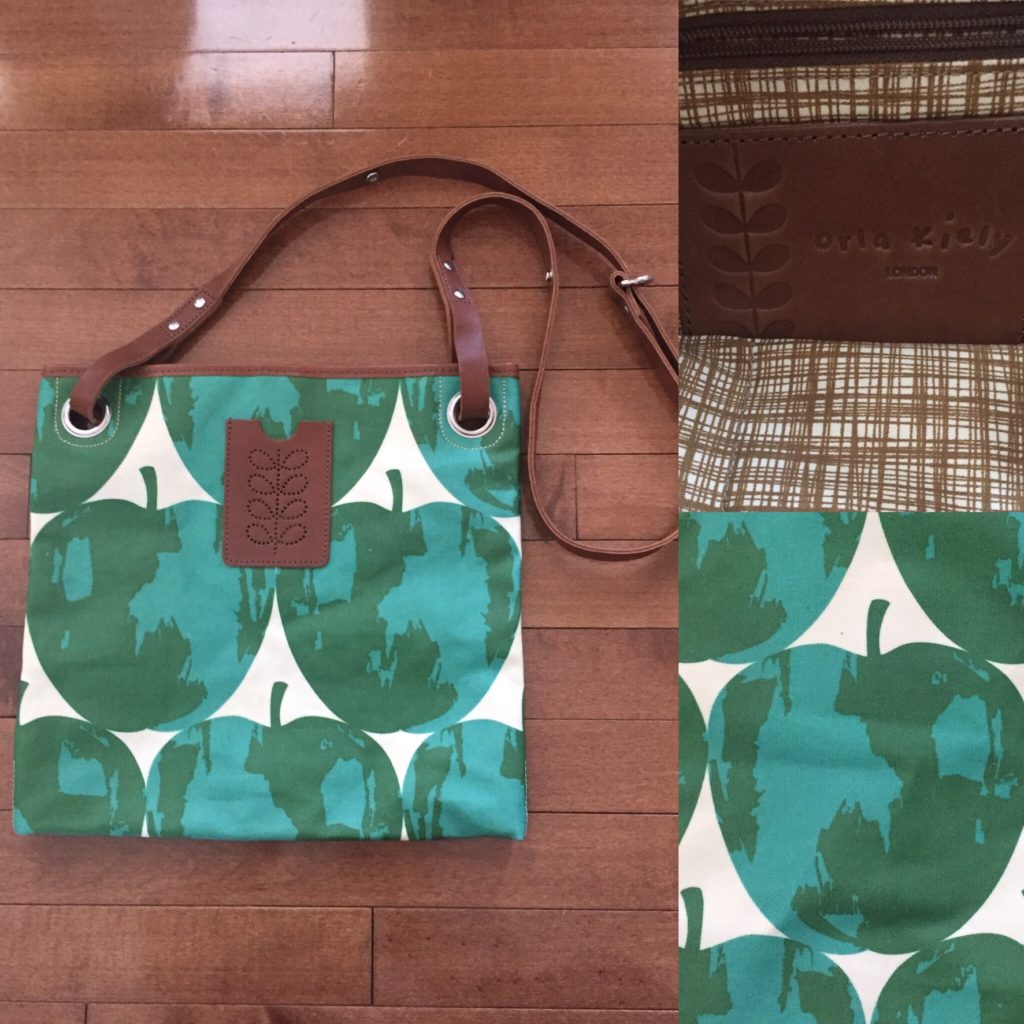
… and turned into an incipient trend when I thrifted this Orla Kiely cross-body:

4620A04E-3B22-412B-814A-D98D4BC528B2

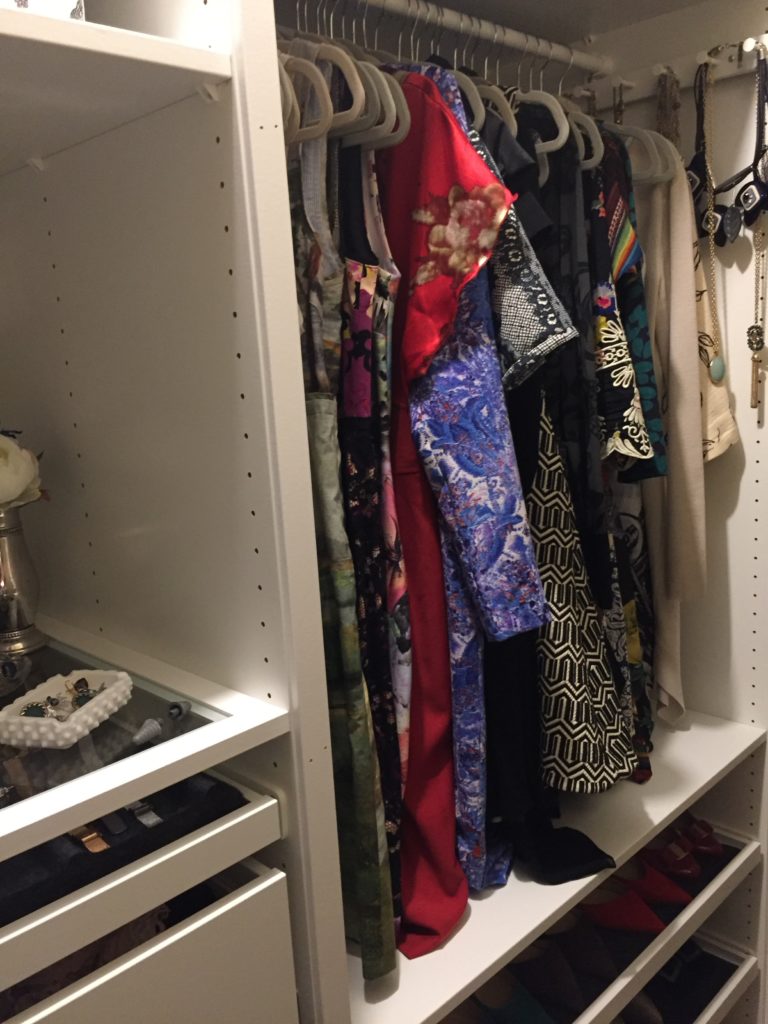
I also thrifted and gifted a Fossil Keyper tote, which I was sorely tempted to keep for myself. I am not exactly sure what is behind this new attraction, but it may have something to do with the fact that I am increasingly eschewing prints in my outfits; my love of patterns and colours is probably looking for another outlet. It helps that these bags come at a much lower price point, making them a much lower stakes commitment. I am getting a bit bored with my (much worn, much loved) designer bags, but I haven’t found a new one that sparks true “bag lust”; probably for the better, my wallet would say.

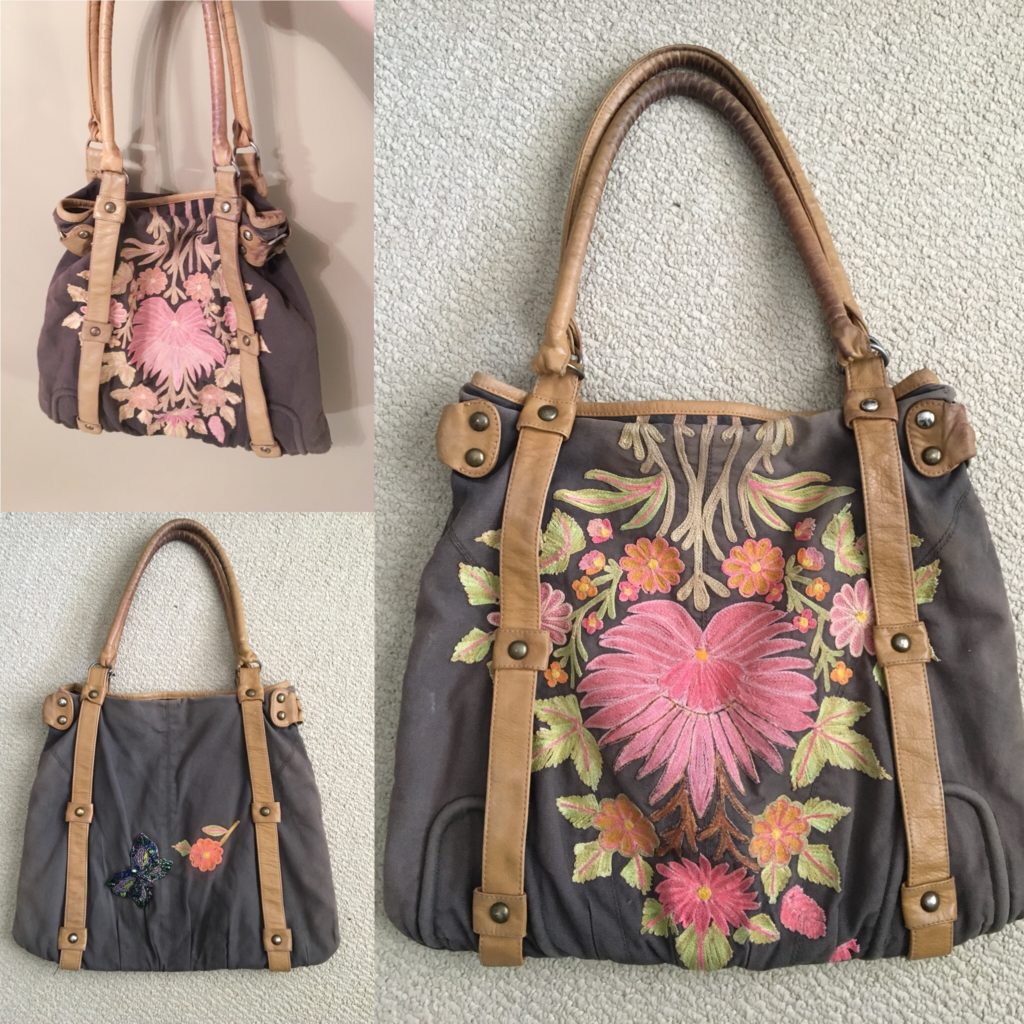
Emboldened by the success of my wool blazer-rehabbing project, I have also been keeping an eye out at thrift stores for another opportunity to expand my skills. All of which is to say – when I spotted this rather disheveled Miss Albright bag at VV, I decided it was perfect.

7D49F62A-2669-468C-A2DD-490C6D7ADC66

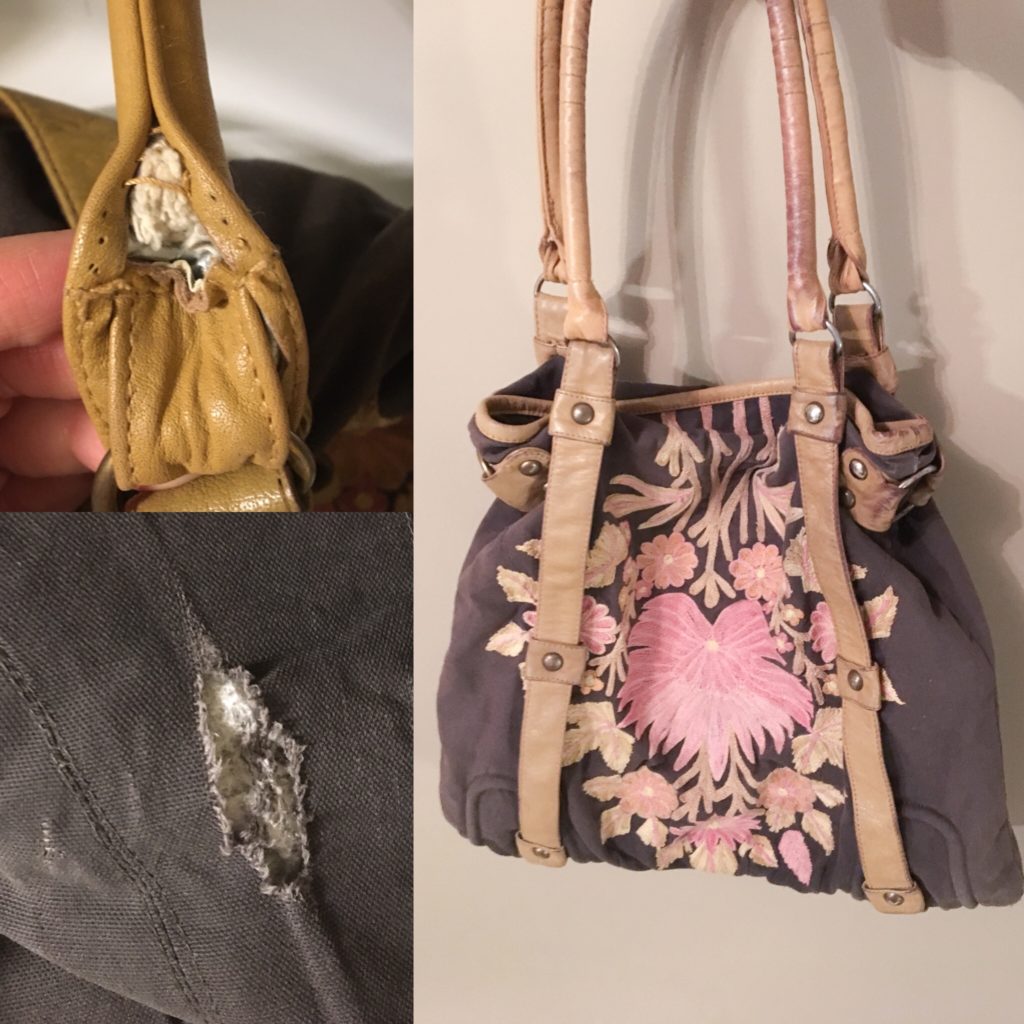
A quirky bag, needing a lot of TLC. Sign me up!

The bag came to about $6 after 30% off coupon; VV refused to give me a condition discount, which was annoying considering that the bag was, effectively, worthless at that point. [Note: I didn’t ask for anything in particular, and would have accepted even $1 off, merely as a gesture. VV customer services sucks.] Surely not that bad, you’re thinking? Well, the stitching on one of the handles was coming apart, the embroidery was faded, the inside and outside had seen better (cleaner) days. Oh, and did I mention the giant rip in the back?

To be honest, I wasn’t sure I would be able to rescue this bag; certainly, I knew there was no chance I could restore it to its original condition, or anything close. But I thought I could clean it up a bit, and I had an idea for fixing the rip and … well, I took a chance. Here’s what I did.

First, I gave it a bath. I learned from my Smythe blazer experiment that the leather trim would not be damaged by a little dunking, so I immersed the bag in a lukewarm bath with a bit of baby shampoo. After soaking it for about half an hour, and took an old toothbrush and gently scrubbed some of the dirtier bits of the fabric, inside and out.

I rinsed the bag in lukewarm water, then patted it with towels to dry off excess moisture and left it to dry (flat).

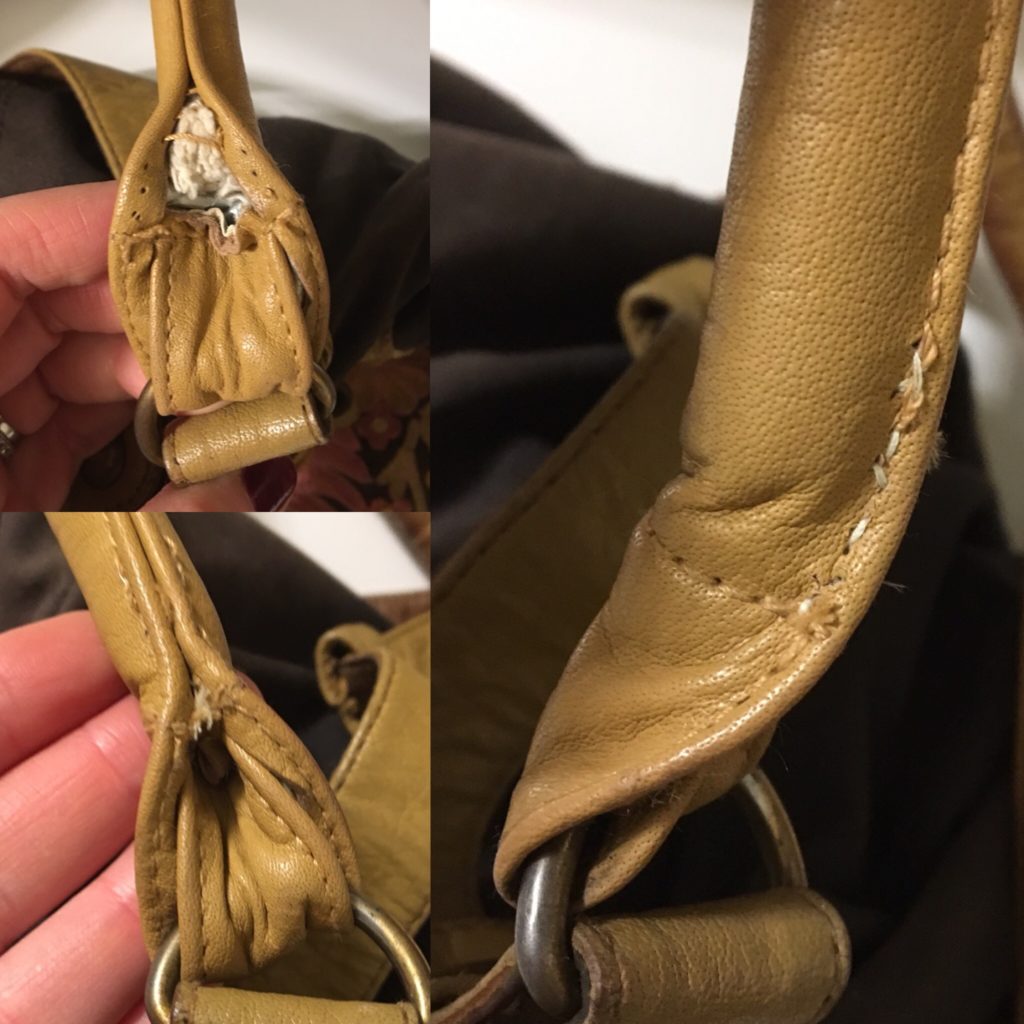
After it was dry, I tackled the handle first. I don’t have leather tools, but luckily I had a bigger needle that worked fine. The result wasn’t exactly artisan-level, but I managed to get the handle re-stitched enough that its “innards” aren’t spilling out anymore.

531FF22E-A235-426C-B3CF-AECEFADF57E9

Next, I worked on the embroidery. I was actually going to leave this alone – and embrace the “vintage” feel of the bag – but then I was Googling and discovered fabric pens. I Amazon Prime-d some over (~$16, and the kids can re-use them as regular markers), and had a go at refreshing the colour.

D337860E-7792-48C2-A7F5-A5A68B750586

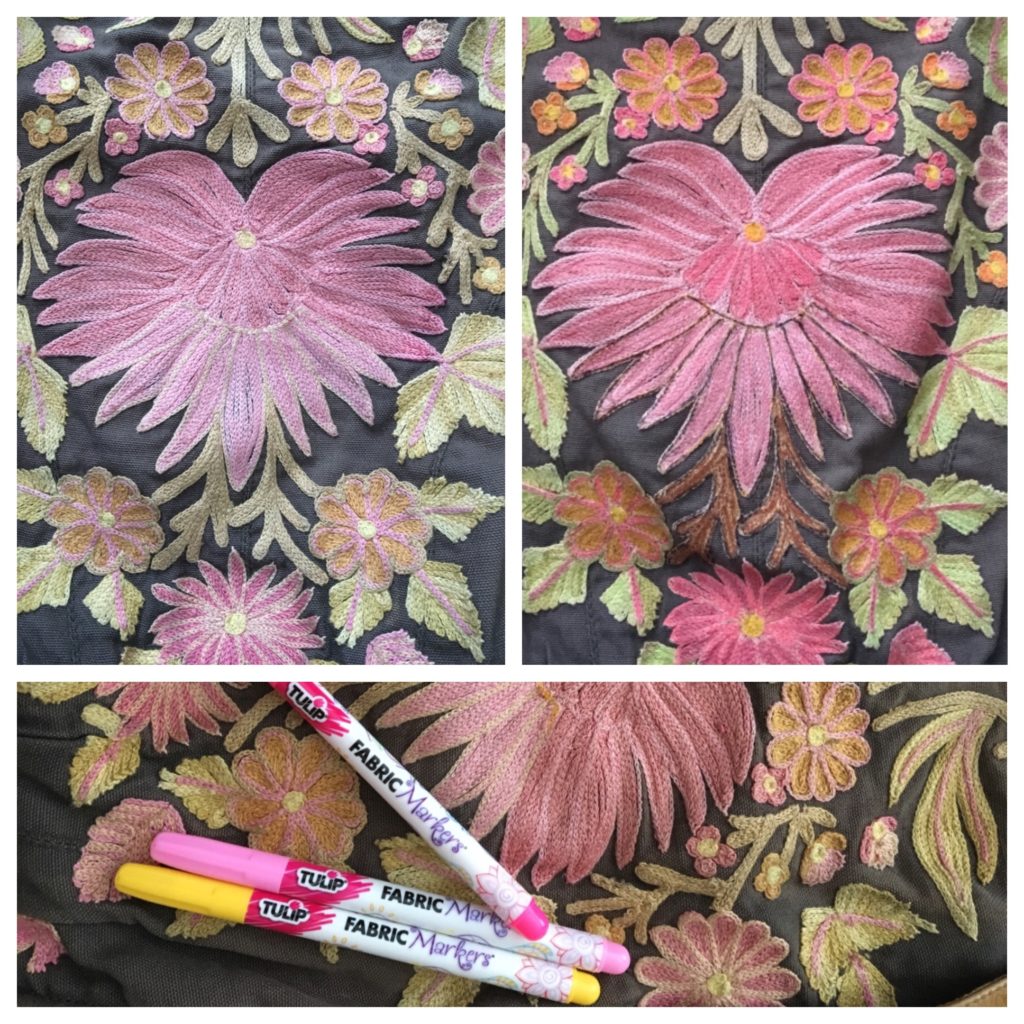
The result is okay but the fabric markers were kinda garbage, in my opinion. Maybe my expectations were too high; I don’t know. I found them prone to bleeding/transfer (all over my hands) and the colours were only so-so. If your in the market for some fabric pens, I would look around for a better-reviewed brand.

Lastly, I worked on the rip. First, I sewed it shut. My stitching looked rough, but I didn’t care because, as you will see, I had a plan to cover it all up.

I knew that I had no way of replicating the embroidery on the bag, and any remotely similar patch I might be able to find would look to shiny and new next to the faded original. So I decided to go the opposite route; rather than match, I went with something that totally … didn’t. If you’re wondering, yes, I was inspired by the Japanese art of visible mending.

Over the years, one of my hobbies has been beading. I have a bazillion projects, of varying sizes and in varying degrees of completion, stashed away in a box, waiting for a purpose. I dug through the box, and found a small “patch” that was about the right size and slapped it over the rip “scar”. Like so:

BE4BF56D-FD43-4730-9FEE-A35833EF5295

And that was it! Cleaned up and rehabbed, my bag looked like this:

Before and after
Before and after

DIY Wool Rehab

I am not a very handy person – in life generally, but especially when it comes to the so-called domestic arts. For the most part, this is not something over which I lose sleep; I have mastered enough basic life skills to pass for an acceptably responsible adult, and I am fortunate to have money to throw at problems I can’t solve. Still, there are times when I wish I had spent more time in my youth learning practical arts – for example, every time I have to pay $20 for someone else to fix a basic hem on a dress. Sigh. Recently, though, I find that I am more inclined to take an occasional risk and attempt a solution myself; thrifting is often the catalyst because, well, the downside of a failed experiment is much less painful at thrift prices.

Such was the case with this red wool Smythe blazer.

0DD31BFC-9CB8-48DB-960A-B00477192E5D

This was my second time spotting Smythe at the thrift store, though it was a far more readily explainable occurrence. My first thrifted Smythe was in impeccable condition; this one … not so much. Commensurate with its retail price, the blazer had lovely design details. Real leather elbow patches; a windowpane print that lined up at each seam, and over the lapels too; that signature waist-nipping tailoring. The only problem? It had been shrunk to hell and back. In fact, it looked like it had made a trip to hell – wash ‘n dry cycle hell. The collar had shrunk into a permanently popped state, and the whole thing looked like a sad, misshapen child’s jacket.

It was also $6 (VV was running a random 50% off sale).

I suddenly remembered reading something online about how wool fibers have “memory” and can be un-shrunk. Without so much as trying on the blazer, I turned to my BFF and said “I’m going to try to fix it.”

When I got home, I decided to see how bad the damage really was. I wish I’d had the presence of mind to take a photo when I tried it on, but the image was comically horrific and my optimism took a nose dive; I pretty much wrote off my $6 then and there. No point in taking a photo to document my certain failure, right?

Well, as it turns out, this story has a happy ending after all. Behold:

558359A9-2422-4021-8714-62A2268B9B39

There is no secret to this “magic”. I mean, all the instructions are right there on The Google. Here’s what I did:

– Soaked the blazer in a bathtub of lukewarm water with a bunch of Johnson’s baby bath shampoo. Don’t ask me how much; I eyeballed it. I realized belatedly that baby bath stuff + running water = foam, but luckily there were minimal suds to contend with. I left the blazer to marinate for about 20 minutes.

– Rinsed the blazer in lukewarm water, then gently squeezed (without wringing) the excess water out.

– Gently pulled and stretched the (wet) blazer back to a more natural shape/length.

– Put the blazer on a padded hanger, then proceeded to stuff it with towels until it looked like a dummy. The arms were difficult to stuff, so I used two small towels – one at each end. I closed the blazer button to hold the inner “stuffing” in place. Then I hung the (still wet) “dummy” and left it to air dry.

– Every so often, as it dried, I would gently pull and stretch – especially the bottom flaps.

The blazer dried much more quickly than I expected; it took about 36 hours. The lining remains fairly wrinkled, but the blazer is otherwise in great shape, including the leather. I think the elbow patches might benefit from a bit of conditioning, but they don’t look the worse for wear. This was surprising to me, though it should not have been; I had read accounts of people who have rehabbed vintage (leather) Coach bags by soaking them, re-shaping, and drying them (followed by conditioning) … still, I have always cringed at the idea of putting leather in water. This was a good lesson for me on that score as well.

14B7FA28-99A8-4109-B112-00151E981615

As successful experiments are wont to do, this one has given me the confidence and desire to test my newfound rehabbing skills on new subjects. Next time I find a beautiful, shrunken Wilfred sweater at the thrift store, I shall not be disappointed; quite the opposite, in fact …

Small Closet Remodel: Reveal!

Ready for a peek at my new closet?

through a narrow doorway ...
through a narrow doorway …

As I mentioned yesterday, my closet is entirely made up of IKEA pieces (the Pax and Komplement series) with custom trim added by my husband. The three units gave me plenty of storage options; so much so that we ended up nixing our original plan for a separate shoe rack/display, and adding 3 extra shelves to one of the units instead. This saved up a considerable amount of space, which is at a premium in my still-tiny (but infinitely better organized) closet. This left room for a few extra touches I quite enjoy. I’ll come back to those in a moment. First, let’s have a closer look at how everything is organized.

left third
left third

The top shelf in each unit is reserved for my bags, most of which are stored in large bins for convenience. I am debating getting shelf dividers instead. (I caved, and signed up for Amazon Prime at the end of December. My life has changed. Everything is a click and free two-day shipping away.) For now, this works. The rest of the first unit is taken up by my extensive blazer collection, along with cardigans, work tops, and skirts. My sweaters and casual tops are stored in three small baskets in another unit in my bedroom (no change from before).

blazers
blazers
cardigans, tops & skirts

At the bottom of the unit, I have a large, zippered Skubb container that’s holding (a) my jeans and casual pants, (b) my tights; and (c) my loungewear. I have no idea if Marie Kondo would approve of my folding strategy, but it’s quite effective.

loungewear, tights, casual pants & jeans

The middle unit is my favourite, if only because it holds all my vintage sparklies. But first, under the bag shelf, we have a smaller shelf which holds 2 boxes – one for my scarves, and one for belts and other miscellany. These units are 23 inches deep, and they offer a lot of space.

middle unit, top shelves: bags & miscellany

Moving on, my “display” shelf is mostly an excuse to show off my thrifted milkglass collection. The piece de resistance is the jewelry display shelf underneath, which is at least 70% of the reason why I wanted the Pax in the first place. It’s awesome, and very sparkly.

milkglass and baubles
all that sparkles (is costume jewelry)

Below, we have a drawer for unmentionables (organized using more Skubb cubes), and then a rack for my dress pants. My husband decided to surprise me with the fancy version of the latter, which comes with “built in” hangers as opposed to a plain rack. I would say that each rail comfortably holds 2 pairs of pants (and you could probably squeeze 3, in a pinch), and there are 5 of them in total.

pants rack
pants rack

The last unit holds my work and casual dresses. (The special occasions ones are in the basement overflow closet.) We also installed two extra racks on the side, one for belts and one for longer necklaces.

dresses peeking out
dresses peeking out
belts!
belts!
necklaces
necklaces

Finally, shoes time! We went with the fanciest option here (approx. $50 per shelf) because it looked to offer the greatest storage capacity. In total, each shelf can hold about 10 pairs of shoes. I did end up having to edit down my collection in the process of moving it into my new closet, and a few pairs, which I was unable to fit in OR part with, found their way to the downstairs closet.

shoooooes!
shoooooes!
shoe pyramid
shoe pyramid

Because the Pax system is so nicely self-contained, I was left with 3 “blank” walls to play with. We re-installed my nail polish display case on one of them, and will be adding a ¾ length mirror on the opposite wall which is super helpful; the only other full-length mirror in the house is in the basement, which is not particularly useful when I’m getting dressed in the morning. Finally, I upgraded my cork-backed jewelry display case by hacking an IKEA picture frame; I did this one all by myself, and managed not to injure myself, and I am disproportionately proud of it, you guys.

jewelry miscellany
jewelry miscellany

Lastly, we added three wall hooks (on the same wall as my jewelry display) to serve as a replacement for my beloved clothes valet, which no longer fits in my closet. I love being able to hang my outfits for the week together in one place, and this was a simple, space-saving solution.

Because things got moved around and re-organized, I also changed up my vanity table-top. Previously, I had used it to display my vintage brooch collection; now, it houses my Wedgwood collection, along with a few more milkglass pieces. It is less cluttered than before (believe it or not), which is a nice bonus.

vanities
vanities
milkglass
milkglass
a few stragglers ...
a few stragglers …

All told, the new closet cost came in at around $900. That does not include the future sliding door my husband plans to install. We probably could have swung the whole project for closer to $600, but I decided to splurge on a bunch of extra features, and my husband insisted that everything had to be trimmed out properly. (Wood is expensive, who knew?) I think the results are great, and the closet 100% more functional (and prettier) than before. No regrets … needless to say, I love my new closet.

And it has inspired me to cast a more critical eye to my wardrobe. Before, it was easy to shove in new pieces because my closet was something of a black hole; it didn’t look that nice to begin with, so adding to the clutter made little difference. Now that it looks much more like a boutique display, I find that I am more inclined to be selective about what I put in it, and also more inclined to respect its inherent space constraints.

Which brings me to my wardrobe management philosophy for 2017.

As should be amply clear by now, I am not a minimalist by nature when it comes to clothes. But also, and perhaps more surprisingly, I am not really a maximalist either. An overflowing closet makes me no less anxious than a too-spare one. My happy place is a balance of classic staples and fun, statement pieces, and each of these categories has its own life cycle. I tend to hang on to my staples for years, because they form the foundations of my outfits; here, functionality and practicality overrule aesthetics, so these pieces are much less likely to fall victim to my desire for novelty. I’m pretty well-stocked up on staples at this point, so subject to finding some replacements for pieces that are coming to the end of their life span, I don’t expect to see a lot of turnover this year.

The second category is where I struggle with wardrobe management. I love prints like they’re never going out of style, but I am fickle in my desires. I get bored fairly easily, and I am easily attracted by new ones all the time. The key is matching up the rate of acquisition of new pieces, and removal of old ones. Since I plan to do most if not all of my shopping second-hand this year (same as last year), the constant turnover does not pose financial or ethical problems for me, but I do need to work on my hoarding tendencies. I’ve never been very good at enforcing the “one in, one out” rule, but it’s never too late to start, right?